Showing posts with label paperclay. Show all posts

Tuesday, March 1, 2011

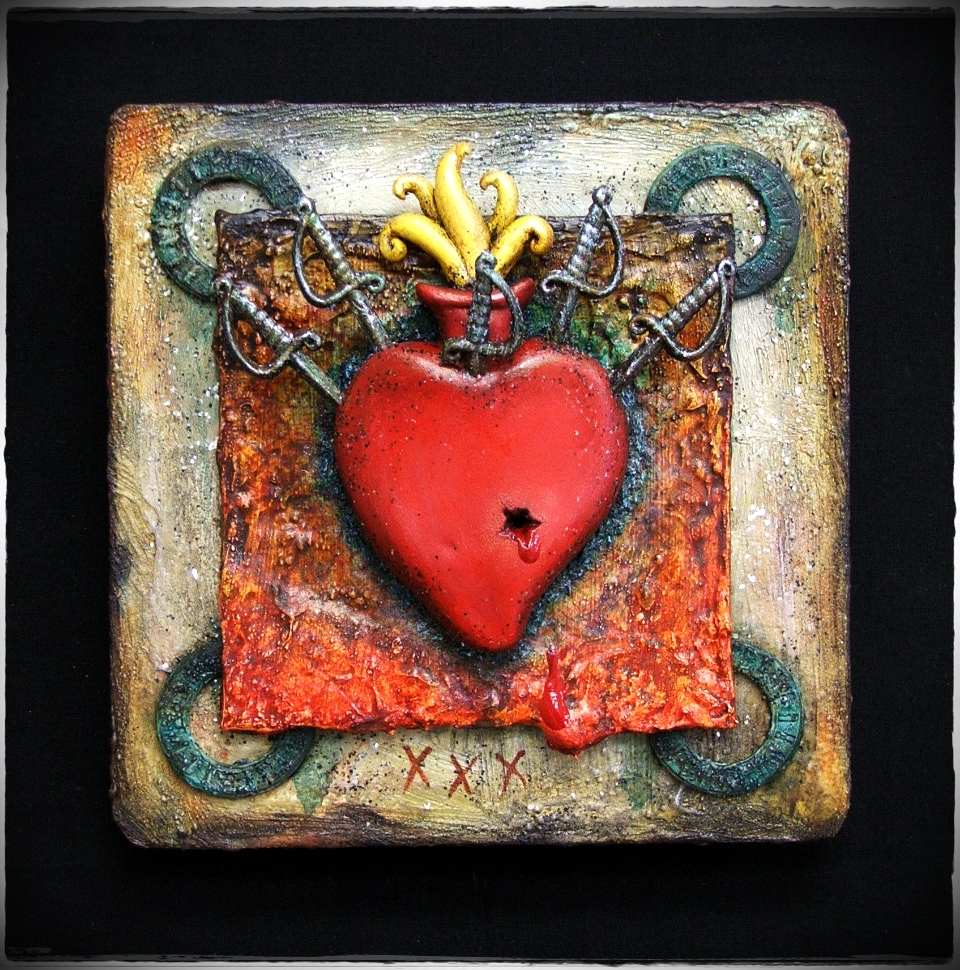
Final Treatment of Heart And Daggers

Final treatment......happy Anne!
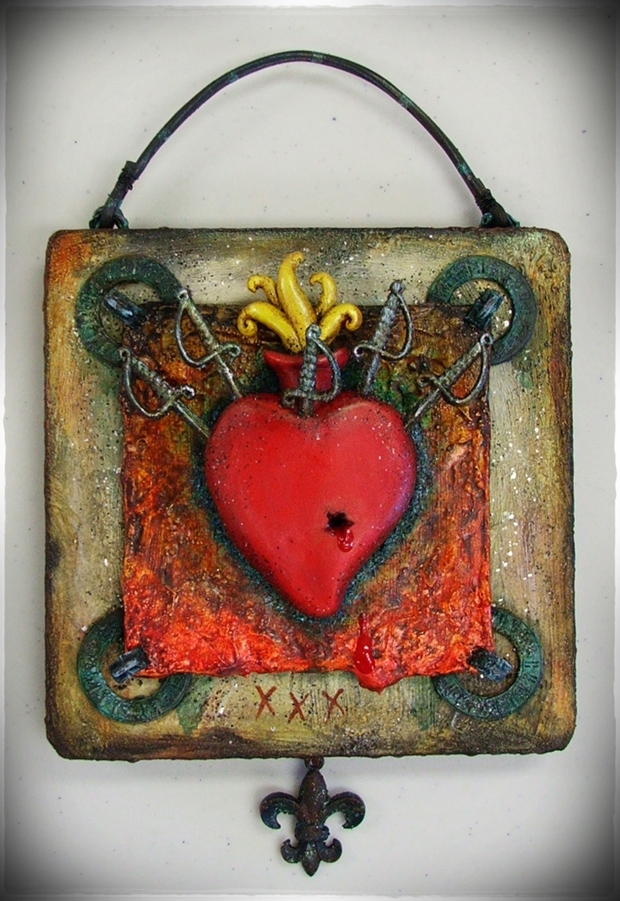
I did not realize, as I have been in way too much of a rush lately, that I had not posted the photo of the completed "Heart and Daggers". I finally mounted it on a birch cradled panel, rounding the edges with my handy dandy bench grinder and then had a ball with techniques I learned in Michal deMeng's class.
I had to jump out of the box, and this is from a girl who seldom is IN a box, let alone knows whether she owns one to stand in! LOL! I went for my hardware drawer in my table upstairs and one in the cellar and pulled any likely suspects out. There spread before me were insulated staples, tacks, wires, washers.....you name it. I was treading into uncharted territory! I was on a MISSION!
I didn't really have a clue what I was doing......
I knew I wanted a specific feel for the background, so painting that wasn't too hard. 

"New Orleans Tomb" color combo....neutral, effective.....
And I had treated some of the insulated staples and washers with molding paste, so that seemed okay.
I just had to put it all together....
Normally my work consists of everything being held together with Golden gels, but this piece had a bit of heft, so I thought, well, if I use the washers, I need another *industrial feel* piece to accent them, and the insulated staples did the trick. Series of washes had brought them up to the nice *Crypt Corrosion* color and when I had the piece drilled, hammered, swathed in paint and all together, I liked very much.

*Crypt Corrosion*~~doing it's thing! Left panel shows the layers of color washes

It's okay, but just not quiet there......not tied together enough.
But it still needed a hanger and if there was something sticking out of the TOP, then there had to be something to balance out on the bottom.
I had changed out an old chandelier in the living room before the holidays, and still had the monster sitting around because I wasn't sure what to do with it. But the clear gold wire was perfect to take paint with the help of some heat, and it became the hanger on top.

I knew that butt-ugly chandelier was good for something....WIRE!!!
I had rooted around and found (while looking for other things...oy!) some cool Fleurs that I had bought with the intention of jewelry, but I grabbed one of those and went to work on it, aging and corroding.

Insulated staples *holding* things together; lovely, aged Fleur.....Oooooo! Too good!
What destructive fun! :-D This is right up my alley!
So, the final piece is greater than the small work I had originally. I was hoping to not overpower it, and by keeping colors somewhat neutral, it worked. Everything fell into place.
I was also hoping to not hammer the wrong thing while putting the corner staples in; I did NOT know how I would replace a broken plastic sword.....
The gods of industrial tools were smiling on me......
(except that one that rules the heat gun, and he is a little STINKER......)
Now go make art! Have fun~~get outta the box!


Pax....

Monday, January 24, 2011

Art With Warm Colors In The Frigid Winter

Okay, I am whining. 
It is miserably cold here (I am sure other areas have it worse and to them I send condolences), to the point I cannot even get out without being socked with a migraine. For once in my life, I am glad I have no idea what the temp is!
So the few minutes I could be upright over the weekend, I managed a little art time, and with VERY WARM COLORS. Yes, it helps. A little.
I had been working on texturing backgrounds for my online class and finally everything dried--rain and snow have kept the dehumidifier busy and honestly, there is only so much it can do. The rest requires patience......wait.....wait....wait.
 
substrate with several paint washes and my fat finger (I love the colors!!!)
When the work was totally dry, I decided to start with the smallest substrate I had made, and while waiting I was working with paper clay for one of the elements to adhere. Which I just HAD to pick up the next morning and the flames broke off....oh well. That turned out to be good over all; I could deal with them separately before attaching them.

heart in hand, and flames too!
a better look at the details....that hole was a PIP to make and not bust everything....
Then it was a matter of trying to get the heart reamed with the Dremel to accept the tiny cocktail swords that had been aged to look, well, old and crusty.
Note here: CLAY SHRINKS
So the holes I had made before drying the piece did not fit afterward and  I had a LOT of quality time with the Dremel and retouching with matching paint. (don't try and do detailed art when your head is pounding out a Conga beat...you really need those grey cells!)


The swords required a lot of trimming and touch up before it was over, but finally submitted to my will, went into the paperclay and behaved. I really liked the transformation on the heart. Sorry about the photo burn out--all the lights in the studio are working now and I have so much light I don't know what to do with it!


Above is the heart with daggers in and the flames basecoated and set in place....


....An overhead view showing everything after the pieces are reattached with part of a pin and E-6000; a bit of the *aging* on the flames for some depth....


And from the front showing the addition of red acrylic and tar gel; a few convincing drips.
This still has further to go. Everything is nice and bright, but a bit too *nice and bright*~~I want a little more earthy feeling, and that is for another post. I'll leave you at this point and hopefully get further down the road with this project.
As an aside, I have discovered that I am clueless as to where I stored a goodly amount of photos in my computer and am going to have to spend a day (or two) retrieving things. I do not know how my mental filing system works.....it doesn't leave me clues. I have a few images I need for the large background this will be attached to, and I have no idea where they are.......
Maybe I'll sketch while I think.....
Maybe I'll just sketch.
Or not!

Pax....

Saturday, May 29, 2010

"La Nouvelle Orleans"--Finis!

Finally....the end of this journey. As I had mentioned before, rough emery boards come in handy for many things. I decided the top of the piece needed a visual *finial* and a small branch of two leaves and an acorn seemed appropriate.
But the acorn was roly-poly and I needed it to sit flat.


Enter the heavy emery board...some sanding...some checking......


.......A good portion taken off, down to the nut center.....


....And there you have it. A self-supporting acorn embellishment to go with the leaves!


And then I had those marvelous metal fleurs from Marie, which I knew just how to put to use, but they needed a hole driven through them with an awl, then a small esceution pin to hammer them in place. I really should have photographed one of these next to a penny so you could realize how delightfully tiny they are!


More grit and gel, and the addition of some leather salvaged from old gloves (very soft), the fleurs hammered into the wet mixture, and a trip to the.......


....handy dandy hair drier to get everything good and firm during this humid weather. I had several photos of the grit area being painted, but evidently the Photo-Pixies were in a humor that day and each and every one was out of focus. (couldn't be that I had my contacts out...no.....)
Below, I decided to add a thin layer of crackle finish to the four sides, just to bump up the texture a bit more. If you click any of the pics, you should be able to see all the detail much better. I coated this with some acrylic, working it in with an old brush and quickly rubbing off the excess so it would not dry. A lovely, light crackle-craze finish. Very subtle.


Okay, this is not so subtle. Sometimes elements just won't behave and you have to remind them who is in charge!!! That leaf was having NO PART of staying stuck down with the gel! It was most stubborn, so I called up the reserves.....and put them to work!


A while later, everyone was behaving nicely and the new focal piece for the top was in place and dry. All the leaves are outlined on the canvas with a bit of acrylic, smudged on and most of it wiped away; only enough left to look like a slight shadow.


Another view, with the corners finished and the leather aged and given a bit of the black mica gel. I liked the way it gave it a more fragile look, as though it was starting to flake.
This also shows off the layers of color drybrushed onto the grit only that was in the gel medium.


I felt the central background was a little too clean and plain, so I used the black mica gel there also, laying some on with a brush and rubbing it in with my fingers, to get it exactly where it needed to be.


Another close up with the addition of the black mica, and that delicious texture showing through the paint in the center! The only thing I really felt needed one more bit of bumping up color wise was the golden glow around the central elements. I felt the color was too close to that of the acorns.


 I added some Quinacridone Crimson mixed with float medium, so I could control the build up of the color and  it was perfect! That tiny bit of extra warmth brought the whole piece alive!


And finally, finally, may I present my labor of both love and insanity:

"La Nouvelle Orleans" 

......looking through Jackson Square (or as it was known before, Place de Arms due to the military keeping live armament there) to St. Louis Cathedral and the Cabidillo.


That ends this trip through process and time and city......thank you for your patience and for coming along. At some point, I hope y'all have the chance to see this beautiful vista in person, sipping cafe au lait and enjoying the Mississippi breezes and the soft notes of jazz floating on the balmy, magnolia-scented air.
I bid you.....

Pax.

Friday, May 21, 2010

"La Nouvelle Orleans", Continued..... (and Welcomes!)

So, how do you sort leaves and keep them in place? The ubiquitous foam plate with double stick tape on it! I had certain ones that needed to stay sorted from the rest that I had on the table, there was a fair amount of fitting to see what worked and I carefully stuck them to the underside of the plate, which proved to be a great way to manage them! (because even if it got knocked off the table....not that THAT would happen in this clean studio.....haha.....)


I had found an old engraving in one of my numerous files of all things New Orleans, and printed it out in sepia onto tracing paper. Actually, I printed a couple until I had one that fit precisely and allowed some of the unique characteristics of the gesso to show through. I did not change the size of the printed pieces much, but there was a world of difference when placed atop the circle.
Originally, I had planned for an image that was perfectly centered, but St. Louis Cathedral was off center in this piece, and it meant I was going to have to consider some shifts from my original vision.
I did color the piece with prisma color pencils and part was on the back, and highlights on the front.


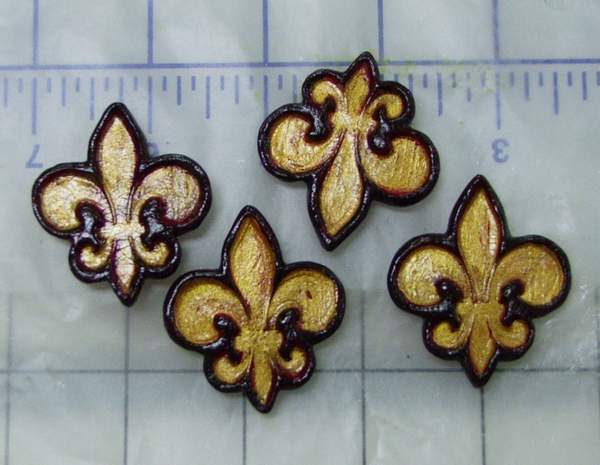
This is a close up of the paperclay Fleurs after the paint, gilding and crackle coat had dried. Still, it was brighter than I felt they should be, sooooo.......


I coated them with a very thin layer of the soft black paint and immediately rubbed it off. Now they appeared aged, as the rest of the piece would be as it moved forward. I apologize for the quality of this photo; for whatever reason the auto-focus did not like the crackle finish.....go figure......


And here I have laid out the paperclay elements (to get an idea of how much more color the background would require) and I have also torn the edges of the tracing paper print, laid it where I wanted it and it is ready to be applied with heavy gel medium. Using the heavy with tracing paper allows for less wrinkling of the paper due to the smaller amount of liquid in the medium itself. Using a soft gel would have produced many wrinkles.


The background color has been intensified, as with the color in the circle. The image is now adhered, has a few paint highlights here and there, and I mixed some budgie grit with heavy medium for the texture in the corners, which also holds the paperclay pieces firmly in place. Normally I would use Golden's Pumice medium for this, but what I had left had dried, and being the impatient sort, I figured budgie grit would work as well.....and it DID. (and it saves me from having to purchase another product!)


This gives a better idea of the rough texture in the corners, and you can also see the depth of subtle colorwashes on the background. I assure you, there are many layers on there. I like bringing the color up slowly until it is *just right*.
Also, it is easy to see how the torn edges of the paper blend gently into the blue background.
The next installment will show the medium in the corners dried and painted.....
It's just like a soap opera...you don't get it all at once! I have to drag it out some! (so I can get the work done and the photos taken! LOL!!!)
And though this is at the bottom of the post, there are new WELCOMES on the followers list and I am delighted to have you here! Good golly, I am getting sooo close to 100 people....
I never would have dreamed.
Thanks to you all for reading and keeping me writing.
I bid you.....

Pax.

Thursday, May 20, 2010

"La Nouvelle Orleans" Part Deux


......To continue (providing Blogger allows me to....grrrrr), I left off talking about the wonderful texture that just *happened* through how the gesso dried and I had to provide a close up. It almost looked like the lunar surface---I was tempted to *save* the canvas at this point ans paint another for the piece....but I got past that when I figured how many days it would take for the gesso to dry and I would lose enthusiasm. (sigh) I really suspect there was just a little hesitation, once again, about screwing it up.
So I grabbed a couple of familiar neutral yellows that can be manipulated easily and trew in a background:

....and more shading , and then laid a few of the leaves onto the canvas to check for proper contrast. I knew even at this point that this was not going to be a high contrast piece like some of my work and I was going to have to be diligent with detail and the intensity of the few colors used. Below is a grainy close up of the area---trying to shoot photos when you can barely see is always fun. I am glad this is not for a book.......

And yes, I sorted through the box of leaves and picked ones of similar size and shape to balance out the wreath around the central area. (would you expect anything less....ummm......anal???)
As I was working on the piece, more news of the oil spill in the Gulf was coming in and I could not help but think about it, with the soft blues and then the dark mucky browns I had chosen. While my intent was to pick colors that emulate the water logged silt that supports New Orleans, I just kept thinking back to the oil and water. So I further darkened the browns. Colorwise, it worked. No one would know why, and that was fine. With every stroke, all I could think of was oil infiltrating the swampy land.


Anyway, I was at a point where I had to tint the paperclay fleurs and you may be saying *WHY* did she pick that horrible magenta???
Because, whenever you put gold on, you want a warm or cool color underneath. It affects the final color of the gold......as you can see below.


I used a soft black on the outter edges and Golden fluid acrylic for the gold in the pressed image. They were bright. VERY BRIGHT. I knew with what I wanted to do with the color further on in the piece that these needed toning down, so the handy-dandy crackle medium came out and they all got a good bath with it.
WHEW! That was a lot of work and words! In reality, it was several days too. I do not hurry this process. I like having time to think about how pieces will play in the overall piece.
One thing I find in a lot of today's art is the idea of instant gratification, which in some cases is fine.
But letting yourself be completely immersed in a piece of art as you make it slowly has benefits too. You learn much along the way. You learn to plan ahead. You have to hang onto the original vision while being flexible enough to change things as need be.
Now I need a nap and you all need either a huge cup of coffee or a box of No-Doze.....
I'm all for the coffee myself!  ;-)

Pax.

Tuesday, May 18, 2010

The Start of Art--or--*La Nouvelle Orleans*

How do I even begin to describe this work......sigh.....

This piece has brewed in my head for a very long time. Probably as long as from the first time I went to New Orleans, or from the year I brought home the acorns from the live oaks (and forgot them in a ziplock bag in my purse, only to discover a month later worms had hatched....), but I never managed to collect any leaves to go with them. The acorns....not the worms. Each year, there seemed to be some reason I could not get them; weather too wet, me too forgetful, the parks dept. had swept things up.......I could not imagine any of the locals being happy with me yanking leaves off their lovely live oaks. Thus, the idea just rolled in the grey matter, way in the back of the cerebral file cabinet.
It waited.
And waited.
And waited.
Recently, however, two things happened almost simultaniously; Silke @ Metamorphosis said she would be glad to send me some live oak leaves (and I am sure stifled her laughter of the requests of a crazy woman!) and Marie @ Art From My Heart surprised me with a bag of lovely little metal fleur de lys charms.
The piece now HAD to begin process!!!
But when you have held an image in your head for so long, it is difficult to start. I stared at the heavily gessoed canvas for days, trying my best to figure out precisely what to do. Oh yes, I saw what I wanted in my head perfectly......it was just getting from the head to the hands to the canvas, and kiddies, that is not necessarily an easy journey.
I decided the safest way to start (yes.....safe, as in, NO RISK, as in, UNSURE, as in, SCARED TO DEATH!) was to take a couple of Fleur stamps, stamp four images and see how they looked in the canvas corners, as in the top photo.  


This was to try out size for the actual pieces I would do out of paperclay. As much as I loved the fancy one, it was quite obvious that the smaller one was going to fit the piece much better. So out came the paperclay, and I stamped and trimmed out the four pieces for the corners.
I love working with this medium. It is easy to handle, can be put in a toaster oven to speed drying, and a heavy nail file (the type for those big, honking fake nails) is perfect for smoothing the edges. They are easy to hold onto, can be purchased cheaply in packs at the dollar stores and can also be used flat on the table to sand the backs of things down even.

So here I was, with a plate of clay pieces, metal charms and dead leaves. That's an art-starter for me for sure!
Next step was thinking about the leaves. Oak leaves are by nature leathery, and seem to take a very long time to become brittle, which is good in that I had then a couple of weeks before I could figure how to use them. I applied a couple of layers of acrylic glazing liquid which made them more pliable, but the leaves seemed to absorb some of it slowly--they were not quick to dry. The second coating was gloss gel medium, and that appeared to give them a bit more body.
And then there was the pesky canvas......white, glaring at me.....okay buddy, you're getting a nice circle painted in the middle and those few light coats of color, brushed on, wiped off, repeat, repeat.....that broke the mental block. The detail in the gesso showed up wonderfully and seemed absolutely perfect detail wise! Now I knew where I was going, and I was pretty sure of some of the tools I would use getting there, but there were still challenges ahead.
I will be doing this in a series of posts--they may not be every day--but will show the piece in progress. I am delighted and excited about where I have it now. It has been slow, meditative work which is perfect for recouping from the arthritis. I have been forced to do one or two steps and quit.
And wait.
Again.
I hope you will stay with the progress reports and enjoy the ride!

Pax.

Thursday, April 22, 2010

More Parts, Please!

Yesterday I took time to go have lunch with a friend and see some art, wander about a bit, then come home and enter my tidy, completely organized studio with work waiting on the table.......
I seem to keep acquiring things on the table....this is actually after I straightened it up after a few *parts* went flying and were difficult to find.
(Note to self: do NOT turn on the ceiling fans when there are loose paper pieces....)
Yes, there were a few moments of panic as I frantically searched for tidbits of torn paper. And NO, I could not have replaced them with OTHER torn paper......I was having a *Monk* moment. I seem to have a lot of those.
At any rate, I think this is where we left off:


Well, maybe I had added more.....I tend to forget to get the amount of photos I should once I am in the creative zone. Anyway, I did do a few close ups so you could see some of the process. I tend to start aging things at this point. Adding, covering with gel, then paint---pushing backward, pulling forward. It is all rather by instinct as I get a feel for where the piece is going and I generally try and stay out of the way. When I begin to push, that's when I leave the studio and let things sit and brew.


Certain elements were slow work, such as painting the back of the tracing paper the skeleton had been printed on. Doing so allows it to be opaque and stand out. It is the primary focal point, though the piece has more than one, and this is where laying bits out and thinking helps.

I still have not applied the skeleton to the canvas; that will be the last part to do. It is integral that all the aging be done first, everything else that might need to be under it's edges finished. I double, well...no....I probably triple sprayed it with varnish in hopes of not having wrinkles when I finally plaster it down.


The heart is a stamped image, and is also painted on the back, but with fluid acrylics reduced with some water, so it is not as intense. Same paper as the skeleton, slightly different way to apply color.


The *wax* seal in the lower left hand corner is Paperclay, dried and edges sanded to shape, then painted and glazed with a bit of black to bring out the lettering....strychnine.....a must in all old apothecaries.


This is NOT how you are to mount loose rubber stamps.....but it works when one is in a big hurry. LOL!


And that brings me to where I am leaving it for more work on giving it a sense of weathering and getting the colors all balanced out right. The sides will need work, as will other areas on the top. It is a back and forth type of process....a little here....a bit there.....
I am not sure what I do is a style that would appeal to others. It is slow work and requires a lot of trust in instinct. Sometimes I hit the mark, and sometimes I miss.
But when it all works right, wow.
It is a LOT of fun!
We'll continue later....this post has become a tremendous headache as Blogger is throwing images left and right and eating words and changing fonts......I've had all I can bear for one evening.
Besides, "Bones" may be on the tube and I want to go vegetate!

Pax.