Showing posts with label New Orleans. Show all posts

Wednesday, December 26, 2012

The Very Best Of Times....


....this Christmas. I had tried to find time to do a pre-holiday post, and like everyone else, life got crazy with little things that needed finishing up, plus our area has been preparing for a blizzard, which may or may not hit today. We're right on the demarcation line, so I'm holding my breath, but the snow blower is ready as is the operator. (Moi)


It was a good, GOOD Christmas here. I could not have asked for better. I learned that hanging around half the day in Jammies and hand knit socks is QUITE GOOD, but sticking a bow to one's fuzzy head is QUITE BAD, as removal of said bow removed hair too. OWIE!!! (live and learn...lol!)

Even the Miser Brothers decided on a few minutes of Peace On Earth to send out happy wishes! Hey, if they can, can't the rest of US??? The posts on Face Book of late have just been beyond my ken. Mean. Fear-mongering. Things are split in a season that we should all be coming together.
A little KINDNESS please.


We did our usual non-traditional meal of New Orleans influence and I can honestly say I am so stuffed from crawfish and shrimp, I don't care to see either for......oh, a day or two??? ;-D Things were definitely YUMMY as we rolled quietly into the evening.

Another learning experience:

While these little guys smell like HEAVEN cooking, leaving the empty shells till the following morning is a BAAAAAAAAAD IDEA! Oh my. Yeah, I was having a Vieux Carre moment.....walking down Bourbon Street in the morning with the smell of, well, NOT GOOD wafting through the air.
I tended to the chores quickly.
And to cap off a lovely evening, as the sun dipped, with clouds rolling in, there was color for a brief moment.
Winter makes you run to catch those bits of amazing atmospheric change. Wait too long and it's all gone.....like a dream, wondering if you saw it.


And so Christmas 2012 is wrapped up, today, Boxing Day, should prove interesting too. I await 2013 eagerly.
Sometimes the very best times you have are the ones you think may never be seen.
I know that well.
Here's hoping you and yours were given sweet moments to remember and that you'll have many more to come!


Pax....

Thursday, April 7, 2011

"Reliquary Memoria"

This is one of those good/bad posts. 
I am delighted I can finally show this piece of art I labored over during the winter on a short deadline (well, short for *me*~~LOL!) but the reason I can now post it is.....it was not chosen to be included in a publication. So you, my gentle Readers, get the unveiling of "Reliquary Memoria". 
The pertinent details follow. 

Sorry for the watermarks..... 
A little more detail....
All the little tidbits....a dry seedpod from a ground cherry, a broken brush and pencil, a shaped penny from NOLA....
Milagros, bottle caps, gold mica gel, my favorite angels.....
Live Oak acorn, split and framing the NOLA Cemetery imprinted on a penny...bone and watch parts.....
"Reliquary Memoria"
17" h. x 10" w.
Materials:

-heavily gessoed cradled wood panel and mini canvas
-metal leaf
-paper
-acrylic paints and mediums
-glass beads, glitter and small vials
-wire
-crushed bottle caps
-milagros
-bone
-pen nibs
-flattened pennies
-plant matter
-mica gels
-paper clay
-crackle medium
-shells
-watch parts
-commercial charms

"Reliquary Memoria" is a repository for many things I have collected, found sacred and held close to my heart. Blue bottles from a Southern heritage of bottle trees, nods to both traditional religion and religions much older and more visceral, the tidbits of nature I collect and hoard in the studio, items either from New Orleans or that represent the unique culture, the passage of time that none can avoid. My love of traditional icons and roadside shrines is evident in the basic shape of this piece. We are defined by simple things in complex variations; the sum of diverse parts that appear to equal nil, yet reflect the core of our soul.


And so it is......


Pax....

Tuesday, January 18, 2011

Tag Me!


Sometimes I find that the harder I try and focus in one area, the more real life starts pulling me hither and yon.
Case in point, it should NOT have taken me so long to finish this current tag for the Sketchbook Challenge. But there were little things like trying to keep up with my online class and FIND things in the studio, distractions such as FOOD and COOKING and then having electricians in to redo all my studio lights.
The good part of that is now they are bright enough I only have to have half of them on. Of course the downside is I can see all the dirt and crud in nooks and crannies which remained well hidden in dim shadows. (there is something to be said for mood lighting.....ahem.....)


At any rate, for those who want a story, in New Orleans the tombs are quite ornate--not all but depending on your personal wealth you could commission someone to build a fine family tomb complete with caveau beneath to accept remains after it was time to push to the sides previous generations and newer caskets be laid to rest.
One of the common motifs is the inverted torch, symbolic of life being extinguished. I photographed several different versions of this while there, but the one depicted was by far the most beautiful. It was the difference between the stone mason and the sculptor.
The drawing started with the watercolor wash, was built up with hard drawing pencils, gesso, and Prismacolor pencils and finally received a bit of both black mica gel and pearl mica gel. With age and humidity, the stone the tombs are made of take on a patina both dark and dirty and tidbits of shiny highlights.

A good view of the under texture from gesso, then the addition of layers of colors and finally the mica gels.
This was a more difficult piece than I anticipated; I have used the image in so many works that finding the *new eye* to really see and interpret was hard. I found myself walking away in frustration several times.
Overall though, I am happy that this varies a fair amount from the photo and took on a life of it's own. It has it's own story to tell now.......
I think maybe the next thing I'll include in the tag book is a crawfish.
Because after photographing it, I can EAT IT!  ;-)
It's hard work drawing AND being witty, or so I think.....don't burst my bubble.
I have no *odd-thing-in-my hand* photo this time, not that I don't have an abundance of odd things within hands reach, but decided instead to leave you with a lovely and colorful Winter sky, as the sun had sunk below the tree line and everything was lusciously shell pink and blue.


Pax....

Saturday, September 18, 2010

Photo Manipulation For Those Like Me.....

......who live in utter terror of Photo Shop, and run like a crazed hedgehog when the program boots up, I have an answer! While wandering on line the other day, somewhere, I came across a photo someone had manipulated in Photoscape and my interest was piqued. Because they mentioned that it was easy......and free! Two words that send my heart pitter-patter!
So after finding the site and downloading, I started playing, and it is easy---all tutorials are on a link to You Tube and you just watch! (of course I looked at the help section after manipulating the photos below.......*sigh*......I should read instructions.....)


Yes, that is me. Young, thin and full of sass. A fun modeling session and I always liked this picture, though there was one that had red-eye from the same session, but I just looked like a little devil! It did not need retouching.....hee, hee, hee!
I digress. I ran this through I don't know how may filters and effects and below is the result, which I like because I have been looking for something to grunge down images to use in collage, or as transfers. (I think if you click on the images, they should enlarge some)


I decided to try some of the other effects and poor Sweet Pea was the guinea pig this time (in digital only!)--going from a simple vignette I had done in another program, to~~~~~

~~~a nice collage-look image that I would definitely put on a shirt or on a card. And again, quick and easy! And fun. There was no swearing involved in the altering on this image. *ahem*........


Finally the ultimate challenge, our photo from Halloween in New Orleans, the fabulous Fiend Night! I have loved/hated this photo due to areas of too much contrast and then lack there of, and if, if, if  I was adept at P.S. I could have changed that.
But I'm not, and the few times I have tried to tinker with the image I have had disastrous results with LOTS of swearing!!!!


So I just cut loose with all the different options and finally got the photo reduced to an atmospheric piece that has more of the feel of a haunting evening and less of a simple vacation photo. (which, don't get me wrong, I do LOVE the original for the sentiment and the fact that it was a good shot to work with!)


Oh yes, very skeletal......very Halloween, DeMeng-ish, quite Fiendish! Muh-ah-hahahahahaha!!!!  Very much New Orleans on Halloween night, too---walking streets lit by gaslamps and the echoes of older times.
Now, all of this seems to conflict with my previous post of missing the film era. And trust me, I do.
But I look at Photoscape as a simple tool to get me from point A to point B when I need something for collage. I don't look at it as an editing and enhancing program. I feel if I am not capable of framing up a decent photo by myself, maybe I shouldn't be shooting it. I have the simplest of photo editing programs (in fact, I don't think it is even made anymore) and basically it lets me crop and change pixel size and do very simple tweaks on exposure; all things I did in the darkroom. I know....I am archaic. I am stubborn. I am lost in another era.
Alas, I don't mind.
Thus, I give this two skeletal thumbs up for ease of use, over all fun, and instant gratification.
And at my age, those are all biggies. LOL!
Now go do something creative!

Pax....

Saturday, May 29, 2010

"La Nouvelle Orleans"--Finis!

Finally....the end of this journey. As I had mentioned before, rough emery boards come in handy for many things. I decided the top of the piece needed a visual *finial* and a small branch of two leaves and an acorn seemed appropriate.
But the acorn was roly-poly and I needed it to sit flat.


Enter the heavy emery board...some sanding...some checking......


.......A good portion taken off, down to the nut center.....


....And there you have it. A self-supporting acorn embellishment to go with the leaves!


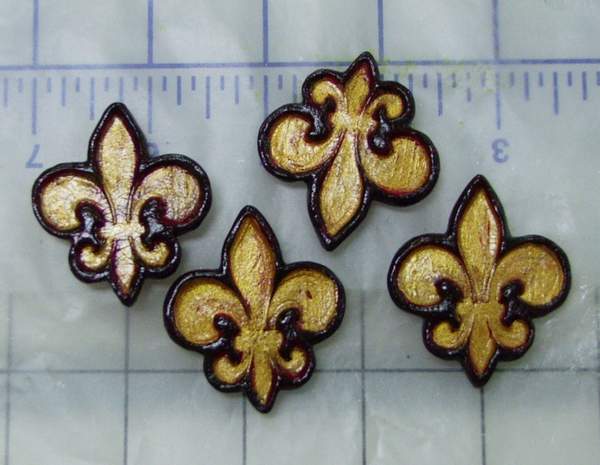
And then I had those marvelous metal fleurs from Marie, which I knew just how to put to use, but they needed a hole driven through them with an awl, then a small esceution pin to hammer them in place. I really should have photographed one of these next to a penny so you could realize how delightfully tiny they are!


More grit and gel, and the addition of some leather salvaged from old gloves (very soft), the fleurs hammered into the wet mixture, and a trip to the.......


....handy dandy hair drier to get everything good and firm during this humid weather. I had several photos of the grit area being painted, but evidently the Photo-Pixies were in a humor that day and each and every one was out of focus. (couldn't be that I had my contacts out...no.....)
Below, I decided to add a thin layer of crackle finish to the four sides, just to bump up the texture a bit more. If you click any of the pics, you should be able to see all the detail much better. I coated this with some acrylic, working it in with an old brush and quickly rubbing off the excess so it would not dry. A lovely, light crackle-craze finish. Very subtle.


Okay, this is not so subtle. Sometimes elements just won't behave and you have to remind them who is in charge!!! That leaf was having NO PART of staying stuck down with the gel! It was most stubborn, so I called up the reserves.....and put them to work!


A while later, everyone was behaving nicely and the new focal piece for the top was in place and dry. All the leaves are outlined on the canvas with a bit of acrylic, smudged on and most of it wiped away; only enough left to look like a slight shadow.


Another view, with the corners finished and the leather aged and given a bit of the black mica gel. I liked the way it gave it a more fragile look, as though it was starting to flake.
This also shows off the layers of color drybrushed onto the grit only that was in the gel medium.


I felt the central background was a little too clean and plain, so I used the black mica gel there also, laying some on with a brush and rubbing it in with my fingers, to get it exactly where it needed to be.


Another close up with the addition of the black mica, and that delicious texture showing through the paint in the center! The only thing I really felt needed one more bit of bumping up color wise was the golden glow around the central elements. I felt the color was too close to that of the acorns.


 I added some Quinacridone Crimson mixed with float medium, so I could control the build up of the color and  it was perfect! That tiny bit of extra warmth brought the whole piece alive!


And finally, finally, may I present my labor of both love and insanity:

"La Nouvelle Orleans" 

......looking through Jackson Square (or as it was known before, Place de Arms due to the military keeping live armament there) to St. Louis Cathedral and the Cabidillo.


That ends this trip through process and time and city......thank you for your patience and for coming along. At some point, I hope y'all have the chance to see this beautiful vista in person, sipping cafe au lait and enjoying the Mississippi breezes and the soft notes of jazz floating on the balmy, magnolia-scented air.
I bid you.....

Pax.

Monday, May 24, 2010

Further Along The Road To "La Nouvelle Orleans", Under The Live Oaks......


This is getting long enough that I am to a point I am having to go back and read the blog to know what I have already put up! LOL! That's not good......  ;-)
On the other hand, it gives you an idea of why these pieces take me so darned long to do.....
The live oak leaves above had been coated with the following:
Golden Acrylic Glaze, Golden Soft Gel medium, and a bit of fluid acrylic was put on to enhance the color. I do not know long term if they will stay as is or brown. I figure to err on the side of safety.
At any rate, I still found them a little blah, so I got out my DecoArt Crackle Medium and coated all of them with that. The leaves on the left are just with the medium after it dried and the ones on the right have a thin layer of raw umber glazed on, worked into the crackle and wiped off.


This close up shows it better. Depending on what you want or need, one could stop at any of the points along the way with the leaves. I just felt since this is a piece about age, the darker leaf would be more evocative of that feel. I can definitely see uses for the leaf on the left, with the addition of a light color to seep into the crevices. It would be totally different. I think it's pretty obvious I love experimenting with these things......!
One thing to check if you try this;  make sure the color has dried before proceeding. It doesn't take long. Otherwise you will either stick to the leaf or lose part of the color. (don't ask...)


Each leaf was coated heavily on the back with Golden Heavy Gel in a matte finish. Since the leaves are not flat, the medium fills in the space between the leaf and canvas. Generally I would have more than I needed on the leaf.....


.....Start by spreading some with a palette knife to the edges and add until it appears the whole cavity is full.
One other thing I want to point out, and sorry this is out of order; the corners with the paperclay fleurs were painted with a soft black, dry brushed into the texture of the grit and gel. When it was dry, I used a bright aqua-blue, getting a tiny bit on a brush and just allowing it to sweep over the very top of the textured ground. This combination of color works well in other projects too, but is particularly suitable for the work at hand. The photo below shows the corner treatment a bit better.


Some of the leaves were determined NOT to stick down, so a few stray paint bottles solved the problem. In areas where the medium oozed out, I used a damp brush to remove excess and smooth all the exposed edges, such as the visible area under the small Golden jar. These will be painted later to disappear. You also can see an acorn half I have inserted under one of the leaves; it was luck that one leaf was greatly curled and wrapped the acorn perfectly.


Remember me saying that with St. Louis Cathedral being offset from the center of the circle I was going to have to adjust a few things? That came in the addition of the small oak twig, to circle the top and push the focal point more to the left, where the building is. The twig was coated with several brushings of soft gloss gel, gently cracked to hold the shape and coated again. I added a few highlights of paint to it as well.
And now I have to take a break. I think I am writing a book here---I had no idea, really, when I started posting the step by step what I was getting in for! Bear with me on the off days when there is not a new post; these are truly more time consuming than they might appear!
I must add it is interesting to analyse my own work by having to describe what I usually just *do*. I did not realize I put that much thought and effort into small details. It is something I do pretty much by rote; I don't think about it, I do make decisions but mostly I trust my eye and obviously there is a portion of my brain cranking away to make all the right connections. Each piece has it's own story.
Oh dear...I sound pretty pretentious now.
But y'all know me better than that, yes?
Now go create something wonderful and in a day or two, I'll be back with more of my favorite city!

Pax.

Friday, May 21, 2010

"La Nouvelle Orleans", Continued..... (and Welcomes!)

So, how do you sort leaves and keep them in place? The ubiquitous foam plate with double stick tape on it! I had certain ones that needed to stay sorted from the rest that I had on the table, there was a fair amount of fitting to see what worked and I carefully stuck them to the underside of the plate, which proved to be a great way to manage them! (because even if it got knocked off the table....not that THAT would happen in this clean studio.....haha.....)


I had found an old engraving in one of my numerous files of all things New Orleans, and printed it out in sepia onto tracing paper. Actually, I printed a couple until I had one that fit precisely and allowed some of the unique characteristics of the gesso to show through. I did not change the size of the printed pieces much, but there was a world of difference when placed atop the circle.
Originally, I had planned for an image that was perfectly centered, but St. Louis Cathedral was off center in this piece, and it meant I was going to have to consider some shifts from my original vision.
I did color the piece with prisma color pencils and part was on the back, and highlights on the front.


This is a close up of the paperclay Fleurs after the paint, gilding and crackle coat had dried. Still, it was brighter than I felt they should be, sooooo.......


I coated them with a very thin layer of the soft black paint and immediately rubbed it off. Now they appeared aged, as the rest of the piece would be as it moved forward. I apologize for the quality of this photo; for whatever reason the auto-focus did not like the crackle finish.....go figure......


And here I have laid out the paperclay elements (to get an idea of how much more color the background would require) and I have also torn the edges of the tracing paper print, laid it where I wanted it and it is ready to be applied with heavy gel medium. Using the heavy with tracing paper allows for less wrinkling of the paper due to the smaller amount of liquid in the medium itself. Using a soft gel would have produced many wrinkles.


The background color has been intensified, as with the color in the circle. The image is now adhered, has a few paint highlights here and there, and I mixed some budgie grit with heavy medium for the texture in the corners, which also holds the paperclay pieces firmly in place. Normally I would use Golden's Pumice medium for this, but what I had left had dried, and being the impatient sort, I figured budgie grit would work as well.....and it DID. (and it saves me from having to purchase another product!)


This gives a better idea of the rough texture in the corners, and you can also see the depth of subtle colorwashes on the background. I assure you, there are many layers on there. I like bringing the color up slowly until it is *just right*.
Also, it is easy to see how the torn edges of the paper blend gently into the blue background.
The next installment will show the medium in the corners dried and painted.....
It's just like a soap opera...you don't get it all at once! I have to drag it out some! (so I can get the work done and the photos taken! LOL!!!)
And though this is at the bottom of the post, there are new WELCOMES on the followers list and I am delighted to have you here! Good golly, I am getting sooo close to 100 people....
I never would have dreamed.
Thanks to you all for reading and keeping me writing.
I bid you.....

Pax.

Thursday, May 20, 2010

"La Nouvelle Orleans" Part Deux


......To continue (providing Blogger allows me to....grrrrr), I left off talking about the wonderful texture that just *happened* through how the gesso dried and I had to provide a close up. It almost looked like the lunar surface---I was tempted to *save* the canvas at this point ans paint another for the piece....but I got past that when I figured how many days it would take for the gesso to dry and I would lose enthusiasm. (sigh) I really suspect there was just a little hesitation, once again, about screwing it up.
So I grabbed a couple of familiar neutral yellows that can be manipulated easily and trew in a background:

....and more shading , and then laid a few of the leaves onto the canvas to check for proper contrast. I knew even at this point that this was not going to be a high contrast piece like some of my work and I was going to have to be diligent with detail and the intensity of the few colors used. Below is a grainy close up of the area---trying to shoot photos when you can barely see is always fun. I am glad this is not for a book.......

And yes, I sorted through the box of leaves and picked ones of similar size and shape to balance out the wreath around the central area. (would you expect anything less....ummm......anal???)
As I was working on the piece, more news of the oil spill in the Gulf was coming in and I could not help but think about it, with the soft blues and then the dark mucky browns I had chosen. While my intent was to pick colors that emulate the water logged silt that supports New Orleans, I just kept thinking back to the oil and water. So I further darkened the browns. Colorwise, it worked. No one would know why, and that was fine. With every stroke, all I could think of was oil infiltrating the swampy land.


Anyway, I was at a point where I had to tint the paperclay fleurs and you may be saying *WHY* did she pick that horrible magenta???
Because, whenever you put gold on, you want a warm or cool color underneath. It affects the final color of the gold......as you can see below.


I used a soft black on the outter edges and Golden fluid acrylic for the gold in the pressed image. They were bright. VERY BRIGHT. I knew with what I wanted to do with the color further on in the piece that these needed toning down, so the handy-dandy crackle medium came out and they all got a good bath with it.
WHEW! That was a lot of work and words! In reality, it was several days too. I do not hurry this process. I like having time to think about how pieces will play in the overall piece.
One thing I find in a lot of today's art is the idea of instant gratification, which in some cases is fine.
But letting yourself be completely immersed in a piece of art as you make it slowly has benefits too. You learn much along the way. You learn to plan ahead. You have to hang onto the original vision while being flexible enough to change things as need be.
Now I need a nap and you all need either a huge cup of coffee or a box of No-Doze.....
I'm all for the coffee myself!  ;-)

Pax.