Showing posts with label tutorial. Show all posts

Sunday, February 13, 2011

A Valentine Unlike Conventional Hearts

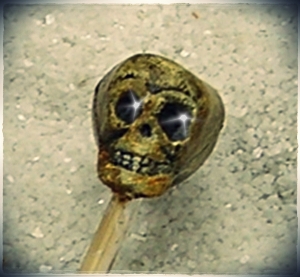
Remember that ornery little skull??? Well, he was MOST DEMANDING as far as being dressed properly......
I promised a finished piece from one of the samples I had used in the gel tutorial, and here it is. I am hoping--reeeeeeally hoping!--that today is NOT the day DH decides to look at the blog, because it is my gift to him tomorrow.

HA! I won! Free makeover, and now I be a Pirate Skelly!!!
That ornery little skull I had to keep an eye on was just a pip to dress properly. He was totally into the Cap'n Jack look.......what's a girl to do??? Just give in and dress 'em! LOL! And I had to have just the right bone to hang from the bottom, plus I couldn't find the coins I wanted and settled for this one. It's okay, but you know how it is when you want something else and can't find it. I need those shelves like they used to have in garages; all the little jars with their lids nailed to the shelf. Believe me...SOME DAY!

And, providing I am not laid lower with this current migraine, I want to put a little something fun up here for my readers on Valentine's Day itself....
This has been a delightful journey through process; I'm not sure how I will follow it up.
I may have to take a few days off and get back to work hard on my Michael deMeng class. I have enjoyed that thoroughly and it soon will end. I am hoping he will have another, because I would sign up immediately. How ideal; work in your own studio and get the benefits of class time when ever you have free time. Economical, fun, educational.
In fact, a goodly portion of what I learned from the class made this Valentine. I could have done one without it, but numerous techniques are in the final product that I learned along the way, between the laughs.
That's what I always hope to provide here, laughs and some learning fun!
So I'm out of here for now~~and remember, love isn't just for Valentines Day or for a Sweetie~~it is for everyone.


Pax....

Friday, February 11, 2011

One Last Splash Of Glitter........

I know this cannot compare with the last post, so let's not even go there. No eye candy, just nominal art.
*SIGH*
Sorry kiddies.
Alas, a boring heart....no Pirates.....
As with most of what I do, occasionally things just take off in another direction and it is NOT what I had in mind. This is the case with the post today; the four heart stencil that seemed like a good idea but was a devil to pull.
I started with a simple scrapbook paper heart, then wanted to use the gold German Glitter for contrast. I do want to add here that the gold glitter is made up of metallic glass and yellow tinted glass, which disperses color when added to the soft gloss gel. (as I found out....)

I did tape this stencil due to wanting straight placement....I could just see it take off....NOT.
Well, first off, I almost could not get the stencil OFF. I mean, those little edges were just not nice at all. I pulled and gently wiggled, and added some spicy words to see if that would help (it did NOT, btw....), stomped my feet and threw a little fit.
After a bit more easing, I finally got the foam off and had to readjust the edges of the gel with the palette knife. Yes, you can do that. It requires a light touch. A very light touch......and yes, the temptation to throw this one in the trash occurred to me several times.


But I decided to let it dry and see what would happen. The problem was simple; I had put so much gel on, it ended up drying without the paper showing through as I had envisioned. So, lesson learned. If you want the glitter AND the background to show, don't pack it so full.

Yeah, yeah, it could be worse....maybe not.
Hmmmph.
While I was waiting and waiting (and waiting.....) for this to dry, I decided to do a very unsophisticated sample chart so everyone could see the other possibilities for additives to gel. I even remembered to write on the back what I had used.....will miracles never cease.....LOL!


1. Fine German Glass Glitter in black

2. Black glass beads (no holes)

3. Fine German Glass Glitter (black) mixed with Budgie Grit

4. Used and dried green tea from tea bags


5. Used and dried coarse loose tea

6. Crushed flakes of leftover mica sheets (they're too expensive to waste!)


7. Gold German Glass Glitter (notice the yellow bleed into the gel)

8. Commercial Golden Black Mica Gel Medium


I wanted to put one of the specialty mediums on the board to see how the other items stood up visually against the real deal. And frankly, I think they do okay. #3 probably comes the closest to the Mica Gel, but it also has a lot of the texture of the pumice gel when you touch it. I probably should have done a wash of paint over half of each sample, but remember, it's ME and I have a short attention span. (and I've been working on several other things at once too....ack!)
I will say the coarse loose tea is wonderful if you are doing a 3-D type area and want to imitate weeds, twigs, etc. Just add the right color paint afterward.
Next post, I will wrap this up with the one completely finished canvas, so that you can have an idea of where these can be taken. I am really hoping my husband does not decide to check the blog, because it is his Valentine gift and I would like to surprise him......*wink*!!!
I've had fun with this tutorial, and hopefully you have been able to learn a bit along the way.
Of course, gel medium is one of the best collage mediums out there, though I recommend matte for that purpose. I probably will do one post on the Diva Gels; the ones you cannot mess with, but are worth the cost.
It won't have cool pictures of Cap'n Jack.
Life is hard.
Sometimes you just have to deal with words. ;-D
Okay....one more piece of eye candy......


"I likes me gel additives too...Savvy???"

Now go make art!


Pax....

Wednesday, February 9, 2011

More Art Making On Distant Shores.......

Bloody hell...what am I doin' on this blog??? Where's me rum?
Alright Mateys, say you be shipwrecked on a spit o' land with only yer jar of gel medium and a swatch o' canvas and yer trusty dagger (a.k.a. palette knife).....

Sands and Dagger Club....
And on that same island you be shipwrecked with the lurvley Cap'n Jack, and he be runnin' out of rum. (ye knows how he gets....)

Why is all the RUM gone???
And so yer thinkin', maybe if I makes him a nice VALENTINE with me gel and some of this here SAND (Budgie Grit) and that pocketful of white sand (decorator sand) I brung back from *The Locker*, the dear Capn's humor will improve.....

The essentials for all Art Pirates....
What say ye??? AYE???
I thought so! So we be using the sands of the isles and putting two types into one heart mold.

Arrrrgggh! Where did this scurvy dog come from? Have he the Black Spot?
That little guy looks like trouble...I'll keep an eye on him.
Working with Budgie Grit or sand is one of the times you will have to mix and pack your mold quickly. The natural tendency for both items to draw moisture away from the gel means the working time is less, as is the drying time.
This is good and bad....good because I hate waiting for things to dry, bad because I need to mix each item separately and then have a bit in the middle where they meet that blends. 

Initial gel packed into mold.
Once you have something that looks like the above (and you can put the white sand at the top if you want, or one on each side...) then take a bit of the leftovers from the initial mixing and fill the middle, then use the palette knife to swish it about a bit. That will set it with the other two gel mixes, and they will be getting a bit of a crust quickly. Don't worry--this works pretty easy. Just have everything ready FIRST, savvy?
When you pull the mold, it should look like this....

Wet gel with sand and grit.
 And then when dry, you'll be able to see the different colors of the grit/sand, like this....

Nice definition of the two different additives.
 And as for this little fellow, me thinks I be keepin' an eye peeled on him. For I believe he be making another appearance with this heart before all this Piratey business be through.....

Who be lookin' at WHO??? He seems up to no good.....cursed, no doubt!
 Now head fer ye posts and don't make me keel haul ye!
ARRRRRGGGGH!!!!

Saturday, February 5, 2011

Are You Gellin'??? (Uuuuuuuggghhhh!!!!)

Oh, Goldens! Oh, glass beads! Oh, JOY!!!

Ouch! Late in the studio humor, which stinks actually, as I don't like that ad! Yep, that was ripe. (channeling the Grinch here...)
Sorry....
Moving right along, we're off with the beginning of the gel mediums tutorial. First things first; I am only using soft gloss gel medium in these demos unless I should mention otherwise. The first I had heard of this was for transfers from inkjet transparencies a long time ago. It wasn't until I began mixed media work that I really discovered all the possibilities it offered.
You will need stencils to shape the gel, and I cut mine from the bottom parts of foam fruit/veggie/meat trays. All are not of the same foam, and some cut smoother than others. As long as you are using a metal cookie cutter for the shape, it will be a lot easier.


I am doing hearts, no surprise if you've been to this blog much, but mostly because I have a lot of heart cookie cutters and I knew where they were!


I use an embossing tool to heat the cookie cutter, and hold it with a pair of pliers or something to keep your fingers away from the heat of the gun. When warm enough, lay it immediately on the piece of foam and press down with the pliers, NOT YOUR FINGERS! 

Press hard!
Unless you have welding gloves (and I do somewhere, but they are lost for the moment) don't let you fingers get on the hot metal. The cutter will only go so far into the foam. 

Fingers away from the heat please! ♥
Remove the cutter, and using the embossing tool again, heat the tip of a small exacto knife, and finish slicing easily through the stencil. The heat will make the edges smoother, and give a nicer finished shape.
Now you're ready to take some gel medium and mix in glass beads. Don't add so many that you have a hard time mixing them together, just a bit at a time.


I use a glass palette--actually an old glass tray from a microwave--and then the gel stays workable longer than mixing on something absorbent. As soon as you have the two parts mixed, place your foam stencil on whatever substrate you choose to use and fill with the gel/bead mix. 

Smooth gel as much as possible--it will not be perfect and some texture is nice.
Hold the stencil firmly with your free hand so it doesn't slip and also so the gel doesn't seep under the edges. The next part is a finesse move. You want to lift the stencil off straight up---that way the sides of the gel shape are nice and clean and the gel doesn't get askew.

A well removed stencil--clean, clear edges! YES!!!
As soon as you have the stencil off, go wash it gently in cool water to remove all traces of gel so it can be used again. (and again....and again....) Save the stencils you make because with care, you can get a lot of use out of them.
This is going to take quite a while to dry thoroughly, as I found out. Mine was about a week until it was solid. While I was waiting and dabbling with other things, I took the little paperclay hearts I had and gave them a first wash of color....

Wow Anne....nothing subtle about this color.....
 ....then gave them some antiquing with a soft black to make all the little features pop out......

Oh much better; I don't need sunglasses now.....
And finally, a week later, I had a dry gel heart.

Very pretty!
The curious thing was the pink that had been on the glass beads? It came off and the color sunk to the bottom of the piece. Which is not bad~~I told you we'd be experimenting together. Obviously the acrylic affects the coloring on the beads, at least these. Had I laid them on top of the gel, it might have been different.
Soft gel in the drying process can be helped along a bit with a hairdryer, but only so much. I frequently will dry it just long enough to stabilize the top layer a bit, then set it aside somewhere safe for the remainder of the drying. A hard bonnet hair dryer works too; I have one that various art goes under besides using it for my hair......multitasking at it's best!
At this point I will close and the next post will deal with something similar to a basic mica gel. I am also doing a very bare bones sample card so there will be a photo of one commercial gel medium and then the possibilities of all the junk I save. It even surprised me.
I'm not usually that organized or far sighted!
Okay kiddies, go sling some gel!!!


Pax....

Monday, October 5, 2009

Welcomes, a *major award*, and yes---I took Sunday off!

I'm still here; I just needed a break yesterday. Allergies are in full swing and I had killed myself working in the studio on Saturday, and enjoying the Open Studio On Line! What fun! Two new followers to welcome to the madness here---sometimes things calm down and I get to make art; it's just not often enough.
I have to thank Georgina at La Llorona Arts for the Kreativ Blogger Award! Now I have to do two things to totally *earn* this.....I have to come up with 7 things people don't know about me and I also have to pass it on to seven other deserving bloggers.

Let's do the blogs FIRST so they can kill me...ahem....THANK ME for passing to them the honor of displaying the award!


These are all creative people who do diverse things and hopefully don't live close enough to come after me....okay Gayle, you probably do but I know you're busy and Lynn, you love me too much....right??? :-)

Now, seven things y'all don't know about me (or really could care less about; yes, it's okay to pick that option!):

1. I was born in Vicenza Italy in 1959.

2. I used to be utterly TERRIFIED of skeletons. Now I practically have a collection of anything with bones.......and save them for artwork.

3. I dated an Undertaker and am acquainted with how a Jewish corpse is treated due to their religious guidelines, and also how their caskets are made.

4. I love reading medical texts for the fun of it.

5. I am trying hard to relearn the Latin I knew as a child from Mass, though there is a difference between *pure* Latin and *church* Latin---the latter being referred to as the vulgate.

6. I regret not having seriously pursued some sort of art/medical related career when I was young, smart and mobile.

7. I lived in California twice and was stupid enough to return to the Midwest the last time.....OY!!!! That comes back to haunt me frequently.......


Well, save and print that for those night of heinous insomnia, read through a few times and you'll be nodding off to snoozy-poo land in no time flat!
Now I'm off to work, and call for repair on my dishwasher, whose motor decided it needed a vacation. While the dishwasher was full of water. Of course. Grrrrrrr.......
Have a happy and productive Monday and may you see all the little blessings about you that we tend to ignore daily.
Life is good!

Pax.
P.S. For a neat tutorial on how to reuse plastic cookie trays, go here! See what Robinsunne has done with what we would normally throw away. This rocks and is better than buying the expensive kind of shrinking plastic!

Thursday, October 1, 2009

German Glass Glitter and another WELCOME!

First off, a hearty Welcome to another follower and fellow artist, Marianne, and you need to visit her blog, marianne's art blog and see the lovely things she is doing! Super use of mediums!
Second, off to my experiments with the collaged background I did during the tutorial a while back and also something I discovered quite by accident about German Glass Glitter.

Here is where I am with the piece---things are coming along; you probably need to click for a larger image so it shows up well enough. Now, the problem was I wanted the glass glitter for the halo, but as you can see below.......

....this stuff was TOO BIG. There are a couple of sizes available but at the time I ordered the gold, only the larger was in stock. And don't get me wrong--the large works great for a more textural application, but this needed more finesse.
So my little brain pondered, "What can I do with this too-big glitter?" All the time, somewhere in the deep curves and recesses of my cerebellum, there is a single synapse firing.......

......"It's GLASS Anne. GLASS BREAKS. Wrap it in something and take a hammer to it!" So I folded down a sheet of waxed paper (which I cannot function without, period) until each side had four layers. I put a small amount of the glitter in the waxed paper and........

......wailed away with a tack hammer! Make sure and hold the sides down so the glitter does not escape. You can't do that and take a photo at the same time......you understand.
When I say hammer, whack it until it is stuck in the paper, because it is a bit resistant. I tried a ballpein hammer and that did not do well at all....it was too heavy and cumbersome. A cobbler's hammer would work well too.
When you are done, you should have something that looks like the side by side below.......
...the soft, powdery glitter on the left and the original on the right. Word of caution: this can get in your fingers twice as fast as the regular glass glitter!!! Use a brush to clean the excess from waxed paper and table, NOT your fingers! (don't ask........)

The final photo gives an idea of how much better the small size works in comparison to the coarse size. Plus, you can purchase only the larger size, then reduce it to what you need. I stored my extra in a glass jar with a tight fitting lid.
I am hoping, in between all the work that MUST be done, to wrap this project up soon and have a completed photo along with a pic of the background before anything other than paper was applied. Should be fun to look at!
Hope this has sparked some ideas---I see this tiny stuff on all sorts of decorations for the holidays; just make sure to use a good heavy glue and don't have small children or pets around when using it, because it sort of resembles colored sugar.
Now---GO MAKE ART!!!!
I bid you,

Pax.

Saturday, August 22, 2009

Part Three: CHEAP CHIC!


(the following work is a copyright of Anne M. Huskey-Lockard, 2009)

Well, here we have the essentials for the next step, and one essential for ANY step in my art, my favorite coffee mug filled with good strong java! ;-)
Your panel is completely dry, and now we get to gesso. There is only one brand I use---ONE. It is the artists grade from Demco, manufactured in Canada and sold locally at Hobby Lobby. Not a particular plug for them, but if you can't find it, you can order it from their website. Make sure it's the artist grade, as there is a big difference.
Have handy an old rag (don't try paper toweling--won't work and it's a waste of money--rags wash), the coarse brush you put the gel on with and just use the gesso off the foil liner. You don't need a lot.
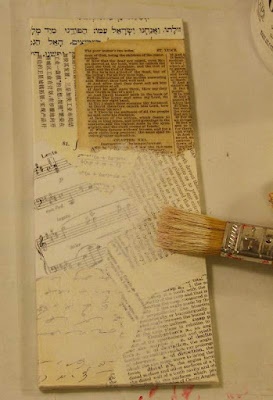
I use a small amount; this is almost a dry brush technique, because you want it to sit on top of the texture from the gel medium, lightening and blending the background papers. Don't put it all over--unless you want to. I prefer a light touch at first and then add as needed.
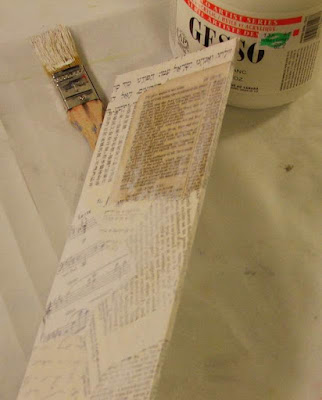
Sorry for the lousy quality of a couple of the photos but I have a hard time holding everything! The side view shows a bit better that all is not covered, in fact, in the process I occasionally will wipe some off with a slightly damp rag, or rub some in to make it fall into the gel grooves.
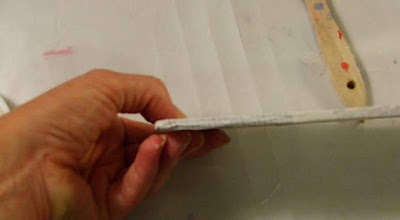
The sides, all around, are covered with gesso. If you think you have a bit too much on, just wipe it down with the rag. No big deal.
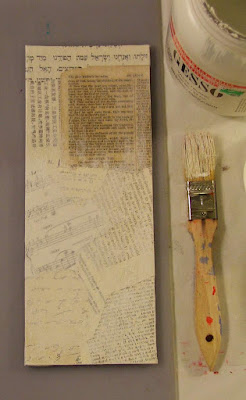
And here is what it looks like when I decided there was enough white to suit me. You can see I left some areas pretty much untouched as they are integral to my final product......at least at this point. That can always change---that's what's so great!
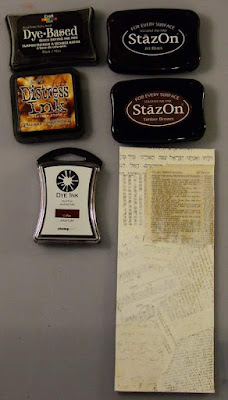
Now to inks. Above are DYE inks and STAZ-ON inks. Dye inks are great in that they dry quick, can be softened with a damp cloth, can be stamped and will be dry soon, but they do require a sealer before putting any other wet media on top of them or they will run.
STAZ-ON, as the name indicates, STAYS ON!!!! On your clothes, on your hands, on you worktable, on everything--which makes it good for final coats, heavy ink applications, and when you know for sure you want something somewhere. I have two colors simply because they are double the price of the dye inks. But they are an excellent product....just take time to learn to use them.
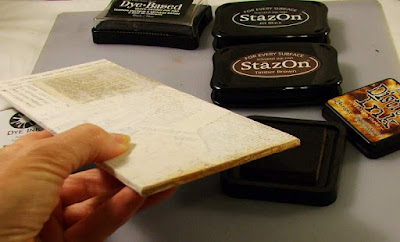
I start tinting the panel on the sides with the dye ink, using the pad to rub it on, then softening the finish with a rag. This isn't quick work---you need to enjoy detail work. A LOT.
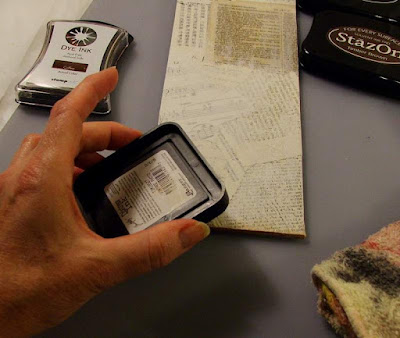
I take the pad and lightly touch it to the top surface of the panel, getting only a small amount of ink on the gel. Practice will let you know the right *feel* of this.
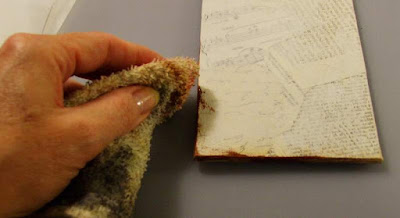
Then I still, usually, will rag the ink, to soften and distribute it around. I only work the outer edges first, to build a visual *frame* of color.
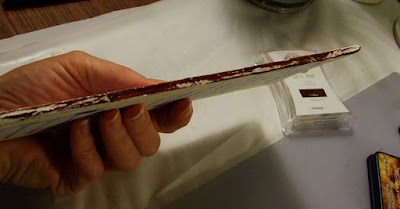
The very outer edge is inked heavily, and not rubbed in. I want the crevices from the paper and gesso to show through as there will be other applications after this. It's a matter of having to learn to leave it alone. (hard lesson for me!) Just ink it and walk away. Go finish your coffee, play on Facebook, go to town. Let it dry.
Tomorrow we will finish the top of the panel, and I probably will leave you at that point to pursue either doing one, or you're going to have to wait quite a while for a finished piece of art from me due to my sewing requirements at present.
This is all very achievable work---anyone can do this. If you can't find the paper selection you would like, visit Manto Fev for one of their foreign paper samplers. It's how I've built my stash and it is most affordable.
Above all else, have fun with this! If you decide to make a piece, let me know. Maybe we can post the finished art here at some point!
Yes, I have thrown down the creative gauntlet!!!
Have a great and productive day!

Pax.

Thursday, August 20, 2009

How To Go From CHEAP To TRES CHIC!!! (tutorial, of sorts!)


(the following work is a copyright of Anne M. Huskey-Lockard, 2009)

I don't think there are any of us out there that have not had, at one time or another, a gift to give or a donation to make that was at a *bad pocket book time*---i.e. you're fairly broke, but you have to do something. Or it is a political thing where if you don't donate you're on the perpetual ca-ca list, and that irks you more that you have to spend money. Or you have to give a present to some extended kin you really DO NOT LIKE (or even know).
Well, I'm here to help you out. (in other words, you owe me. not firstborns...just blog publicity!)
At this point, any professional framers reading this should click out of the page. I know some of you live near me and I want to continue a happy and healthy existence!!!! ;-)
The above frame is a cheapie from a local dollar store; I think I paid between $6 and $10 for it, and it's barely worth that. It is made of heaven only knows what. So you have to be careful in the disassembling.

First, yank off the paper covering the back and see what you have to work with. This is a common cardboard and staple combo, the type that usually has me saying bad words after I've cut myself a few times! The secret to pulling the staples is to pull them straight out at the angle they went in. Sometimes they will split, so be careful! They can rip skin easily!

You usually can tell by looking close; then shove the tips of the pliers into the cardboard, grab that staple and PULL!!! Repeat as necessary until everything is loose. Dispose properly of the staples immediately---I've had them fall on the floor and find them with my feet, or have a piece found with a finger somewhere under a pile of papers. Not fun, and not sanitary. Seriously.

If you're lucky and nothing breaks, you should end up with an assortment of *parts*: frame front and glass, inside decorative piece---which in this case is thin molded plastic (!!!) and what is the *art*. Needless to say, that's going......but you have to use it once first.

After you have GENTLY removed the art from the inner molding, save it in one piece. It will be your template for cutting a canvas panel to fit in the opening left in the molding.
Place the print on the front of a canvas panel and use either a very sharp craft knife or a rotary cutter and ruler and cut the panel about 1/16" smaller on the two edges. (you'll only be cutting two, since the other two will be the panels existing sides) This will allow for space when you use paper to collage the panel, and that WILL add a bit of size to the edge.

Check the fit. I lucked out---no digits cut off, panel fits good with a little wiggle room. Also make sure the canvas panel sits a bit below the molding, so you have room for coats of paper, gel, etc. You don't want that to touch the glass, because I guarantee it will stick.
Now, the next step will be collaging the paper onto the panel, and that is tomorrow's installment!
Tune in again; Same Bat-Time, Same Bat-Channel!!!
And have fun with this-----just be creative and make some art! Cheap.

Pax.