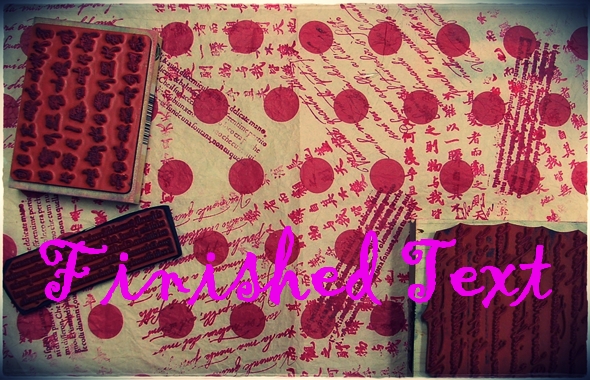
Well, I had to start with a little humor; I'm a bit punch~drunk from all the different papers I've dealt with lately!
First off, all the tissue used here is recycled. The wrapping from a pair of Doc Martens, package wrap, fancy napkins with the other three plies removed~~you name it, I save it. So gather some different types, read a bit and kick back; this is all as easy as....
ONE, TWO, THREE!!!
Stamps consist of three types:
Text
Semi-Solid
Linear
Those are pretty loose descriptions as you can see above. I want text you cannot read for a texture layer, a semi-solid stamp for some punch and then something linear to tie it all together.
Lets see what the text looks like as we begin randomly....
One note before I go on. Usually I stick with Timber Brown and Black Staz-On ink due to the fact the neutrals blend with any color, but this paper with the bright red dots HAD to to have some red.....those dots needed a little competition. (well, a LOT really!)
So after the initial layer of red, I started working in black, adding depth to the stamped layers. (these are the semi-solid stamps helping to break up the red)
And then I add the linear elements to completely tie it together.
The final sheet~~pretty, different, still dotty but not to make your eyes cross. This was the paper I considered the biggest challenge to transform to *good* so that is why I picked it to do the step out pics with.
Also, I chose to stamp on both sides of the paper. Staz-On will be quite visible on the back/front and it helps to give everything a bit more oomph by doing both sides.
Next is the simplest; 1 ply of a printed napkin, 1 stamp, 1 color.
Timber Brown on the reverse and if I had thought, I would have added a butterfly stamp, but I didn't think. So we have spider webs.
It's okay.....just think how they'd look covered with dew!
 This is the Doc Marten paper, finished with brown and black. Somehow, these stamps all seem to work with the Doc's image! I was just grabbing things to fill the space and seemed to luck out.
Don't over think most of these. They will be better just randomly picking and stamping.
Of course, there are exceptions....
The bold stripes needed something totally different, and though it does not show there is a slight pink cast to the paper, so I went for feminine lines and shapes and brown ink to tone it down a bit. It transformed the very formal paper into something you might find in a frilly boudoir.
And then this one needed THOUGHT and special placement of stamps.....
The very strong pattern of the rose stripe made me feel that laying out the text background more carefully was essential, or there would be so much going on visually that it would be bedlam. And brown again seemed the logical choice to soften the edges.
So the two text stamps alternate, then I added linear and finally semi-solid. This was the exception on the order, but then that's the whole thing, isn't it? To take what you have on hand and make it work.
And what do you use these for?
Journals, collage, ATCs, envelope liners, part of the front of a greeting card.....anything you can think of where you want a translucent paper.
Remember when collaging that these are delicate and will tear easily. Use the driest medium you have to adhere them, pat them in place and expect a few wrinkles.
And all the ink you applied will show through amazingly!
I suppose I should have called them "Tattooed Tissue" but I figured I would run you off.... ;-)
Now, have fun and I am off here for a few days with some other work I must finish up!
Pax....


24 comments:
a stamping party oh yeah!!!
Hi Laura!
Stamping party indeed~~I thought my little hands would fall off after doing all of these in one afternoon (and trying to get photos with no ink on the camera! ha!)
XXOO~~
Anne
I especially like the skull and fleur-de-lys stamps!
What fun, and the results are just amazing! Thanks for sharing this. I take it that the Staz-on ink does not smear when adhering it with glue? I'm never quite sure about stamp inks.
Hey Debra,
I love those stamps too--and I use them a lot. I fear I will wear them out and they are two that are no longer made...ACK!!! ;-D
XXOO~~
Anne
Hey Nancy,
Staz-On lives up to it's name--it STAYS ON! (what you put it on, your fingers, clothes, etc....) It is a solvent based ink, so once dried, it is for the most part smear proof. I use it on things that will go into other things; anytime I may used collage mediums.
I have had good luck with it. I cannot guarantee that there isn't some form of glue out there that wouldn't smear it, but I know the gel mediums seem to work good with it.
Hope that helps some....
XXOO~~Anne
I love using tissue paper in collage, and it is perfect for sticking on to non-flat surfaces (like skelly heads!) because it wraps around things so easily. Love yours - beeyouteefull! I don't have any Staz-On, so I GUESS I'll have to add it to my "Going Broke From Buying Art Supplies" list! :)) xox Pam
Pam, you NEED Staz-On. You absolutely NEED IT!!! This is not a frivolous *want* in art supplies.
It is a NEEEEEEEEED!!!! (and you need a coupon too because it runs about $8 per pad, but then they last a long time if you keep them tightly covered...)
I can see you using this technique.... :-)
Yes, I am an enabler.
Oh well! What are friends for???
XXOO~~
Anne
Anne, I love these!! Especially the textured one! Great tutorial! THanks for sharing! You rock!! :)
Hey Cathy,
Thanks~~although at the moment, I feel more like I *roll* (or *rolls*--plural, as in around my waist! hahaha!)
Hope you enjoyed this little flit through the tissues!
XXOO~~
Anne
Nice mix of papers to demonstrate with. I like your all over stamping technique with various stamps. I can see layering these in collage would be pretty cool. Also, the is something about using the black ink that neutralizes whatever kitchy prints might be lurking there. I've got some 50's wrapping paper from my meighbor, might try it on that too and see how it works. Thanks for shring, you are pretty handy aren't you!!!!! Do they make duct tape with skulls? xox Corrine
Ah-hahahahaha!!!
They should make duct tape with skulls!
I stamped on the back of almost all the papers; sometimes they have a glaze that will make the stamps smear, but I would say give any type a try and see what happens.
And I am thoroughly JEALOUS of the 50's wrapping paper! ;-)
Seriously!
XXOO~~
Anne
Hi Anne,
Oh yessss, Fabulous ideas here!
Ah, I'm guessing you save lots of everything in your studio. lol
Happy creating,
Hugs,
Anna
Oh yes, I save too much of everything. Spent half an hour looking for a little notebook. It was on the table in front of me, but holding *saved papers*....ahem! ;-D
XXOO~~
Anne
I like it all. Should one person be allowed to have that much fun with stamps and tissue??
O love using recycled tissue and wrap....the possibilities are infinite and today you have been a very busy girl. Imagine and Live in Peace, Mary Helen
Check out my post today and see what fun I had with my young student Cora!
My son produced a box of 1960s shopping bags and some tissue which must be from the same vintage. Very discoloured but interesting. He saw it at a sale and knew it had my name on it. I'm thrilled to bits because many of the bags advertise shops that vanished when I was in my teens and it's a great trip down memory lane. I can see a book in there somewhere. And now I have some really old (unarchival) tissue to play with. Love that tutorial, Anne, thanks. xx
Aaaaaaaah, everything you're doing with stamps looks like so much FUN! I think I need to go stamp shopping. And oooh, this is a good excuse to go clothes shopping so I can get me some free tissue paper! :D These look fantastic, Anne! Thanks for all the tutorials.
Bella!
I hadn't thought that I could SHOE SHOP and get more tissue!!! :-D
You need stamps...they are a good stress relieved! Just smash it down! WHAMMO!!!
Wish I had some of that nice crisp tissue that used to come in stocking boxes.....
XXOO~~
Anne
ooooh, I have lots of tissue in a drawer! And pretty napkins too1
very inspiring Anne, and as luck would have it I just bought black and charcoal grey StazeOn :)
Today I'm going to a friend's for an art day, but all I'm going to bring is half a stack of magazines that need going through for...collaging!
I hope the storms stay away. Have fun whatever you decide to do with your day!
I have color in my hair (still trying to cover that darn red as it grows out!)
xoxo
lolo♥
LOVE this!! Thank you so much!!
Have fun Diane!
It all goes through an ugly stage, but 99% of the time comes out beautiful.
Remember: More is Better!!!
XXOO~~
Anne
What fun!! Now all I need is a good selection of stamps... Love, Silke
Oh how I love tissue paper, and pretty napkins! I'll have to keep this in mind for fall and winter when things calm down around here from all the garden work.
Post a Comment
Talk to me Dahling!
I'm waiting, breathless...... ;-D