
(the following work is a copyright of Anne M. Huskey-Lockard, 2009)
Well, here we have the essentials for the next step, and one essential for ANY step in my art, my favorite coffee mug filled with good strong java! ;-)
Your panel is completely dry, and now we get to gesso. There is only one brand I use---ONE. It is the artists grade from Demco, manufactured in Canada and sold locally at Hobby Lobby. Not a particular plug for them, but if you can't find it, you can order it from their website. Make sure it's the artist grade, as there is a big difference.
Have handy an old rag (don't try paper toweling--won't work and it's a waste of money--rags wash), the coarse brush you put the gel on with and just use the gesso off the foil liner. You don't need a lot.
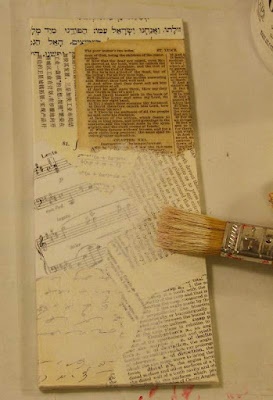 I use a small amount; this is almost a dry brush technique, because you want it to sit on top of the texture from the gel medium, lightening and blending the background papers. Don't put it all over--unless you want to. I prefer a light touch at first and then add as needed.
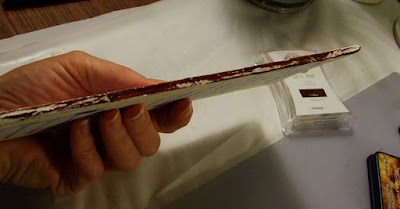
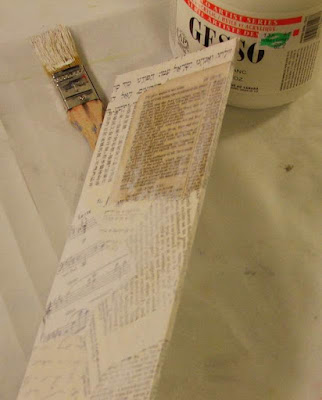 Sorry for the lousy quality of a couple of the photos but I have a hard time holding everything! The side view shows a bit better that all is not covered, in fact, in the process I occasionally will wipe some off with a slightly damp rag, or rub some in to make it fall into the gel grooves.
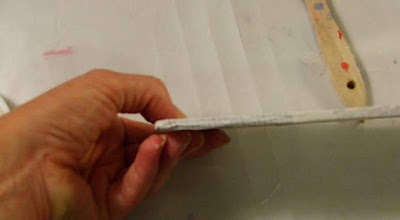 The sides, all around, are covered with gesso. If you think you have a bit too much on, just wipe it down with the rag. No big deal.
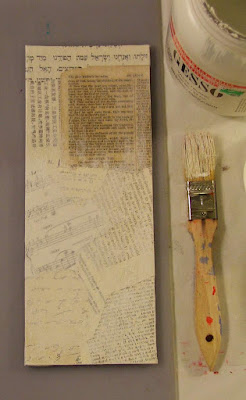 And here is what it looks like when I decided there was enough white to suit me. You can see I left some areas pretty much untouched as they are integral to my final product......at least at this point. That can always change---that's what's so great!
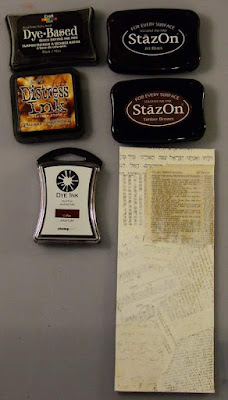 Now to inks. Above are DYE inks and STAZ-ON inks. Dye inks are great in that they dry quick, can be softened with a damp cloth, can be stamped and will be dry soon, but they do require a sealer before putting any other wet media on top of them or they will run.
STAZ-ON, as the name indicates, STAYS ON!!!! On your clothes, on your hands, on you worktable, on everything--which makes it good for final coats, heavy ink applications, and when you know for sure you want something somewhere. I have two colors simply because they are double the price of the dye inks. But they are an excellent product....just take time to learn to use them.
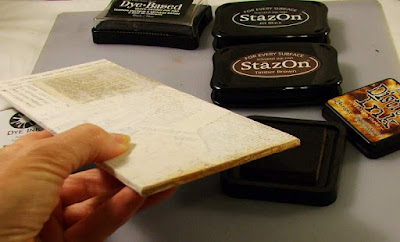 I start tinting the panel on the sides with the dye ink, using the pad to rub it on, then softening the finish with a rag. This isn't quick work---you need to enjoy detail work. A LOT.
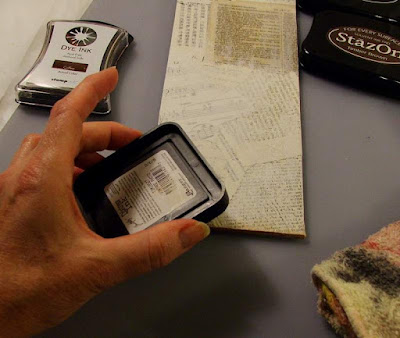 I take the pad and lightly touch it to the top surface of the panel, getting only a small amount of ink on the gel. Practice will let you know the right *feel* of this.
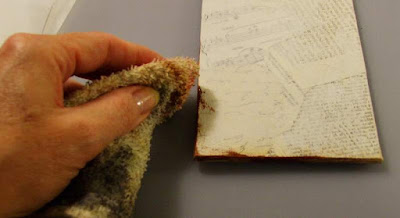 Then I still, usually, will rag the ink, to soften and distribute it around. I only work the outer edges first, to build a visual *frame* of color.
 The very outer edge is inked heavily, and not rubbed in. I want the crevices from the paper and gesso to show through as there will be other applications after this. It's a matter of having to learn to leave it alone. (hard lesson for me!) Just ink it and walk away. Go finish your coffee, play on Facebook, go to town. Let it dry.
Tomorrow we will finish the top of the panel, and I probably will leave you at that point to pursue either doing one, or you're going to have to wait quite a while for a finished piece of art from me due to my sewing requirements at present.
This is all very achievable work---anyone can do this. If you can't find the paper selection you would like, visit Manto Fev for one of their foreign paper samplers. It's how I've built my stash and it is most affordable.
Above all else, have fun with this! If you decide to make a piece, let me know. Maybe we can post the finished art here at some point!
Yes, I have thrown down the creative gauntlet!!!
Have a great and productive day!
Pax.





16 comments:
This is great info, Anne! So the gesso lightens areas for you. Kind of a semi-translucent white? Those inks are calling my name. I am definitely going to attempt something like this.
You are a fabulous teacher! xox Pam
Oh yes, yes!... now, to go shopping for the inks!...i have looked..but there's such a variety..i did not get any yet!
Great info here, Anne...i love your suggestion yesterday of maybe doing more than one of these
at a time..the base work, anyway.
adding the gesso over areas of the gel medium would not have occurred to me..i bet that does give a great texture..
I'll be looking for canvas panels to fit my frames of yesterdays goodwill hunt! great that they can be cut to fit..
again, my thanks to you...we will have to share our work to show you! lol!
gypsy
Pam, not only does the small amount of gesso lighten areas, it provides a matte surface that is receptive to other medias. Things will act different on that part than on the gelled part, which helps to give depth to whatever you are working on.
And yes, this is trial and error for the first few times......and I've learned if I wipe REALLY QUICK with a wet rag, I usually can remove glaring boo-boos.
Uh huh, I make them too! ;)
Jean, I am hoping, from the response of folks that at some point we can all put our work on a post here and see how wonderfully different everyone's is! That would be cool!
I've got one more post on this, then I turn you all loose.... :)
And I, of course, have to sew banners, so it will be a while before I get to the *finishing* of mine, though it will be on the table in the wet studio for hose down-time moments when I need to be distracted.......more than normal! HA!
Have fun with this!!!
I have several STAZ-ON pads - and I never use them. LOL For all the reasons you mention. But I do use all the Tim Holtz Distress Inks - I think I have all the colours, though I really only use three or four of them.
You must REALLY dry brush that gesso on top - I use gesso to cover up oil paintings that I want to use again. That stuff COVERS. But I"m going to have to give it a try - it looks a lot like white washing something. Very very cool.
It really is dry brush. I just touch the tip to the gesso lid. Sometimes if I think I have too much in the brush I wipe it on a rag first, lightly.
This is all a matter of getting the *feel* of the work.
I need to build up my Tim Holtz inks---I love that Vintage Photo color I use.....it's so perfect! And I have learned the hard way with the STAZ-ON, but they do have great applications sometimes. I really want to buy some more but until the banners are done, well, my cash flow is pitiful for non-essentials!!! HA!
Oh, the gel medium helps to keep the gesso suspended somewhat, so if you do get too much, you can wipe it off pretty easy.
Goodmorning Friend. Tell me please what the difference between gesso and hodge podge is or better yet, elmers glue and water. I'm not sure I get it.
Love your project.
Gesso is the white primer used for artists canvas, or any other surface you wish to paint on that is basically non-flexible. Traditional gesso was made from gypsum (I think!) and a natural binder; current gesso is anything from watered down acrylic paints to gypsum and an acrylic binder. It gives a wonderful flat surface to work on, if you buy the right kind.
Mod Podge is a decopauge medium that has been around since the '60 and has a high water content and, at least for me, it SMELLS. Plus I have never used it that it did not remain tacky--it must be varnished when *dry*.
Gel mediums were originally developed for use with acrylic paints but have migrated over to mixed media work because of their durability, ability to preserve papers in an acid-free *envelope* if you will, and will stick to just about anything, depending on what type you buy (soft, regular, heavy, extra-heavy).
For the work I do, basically the least amount of water in the product I use, the better and smoother the final piece will be as far as paper application. If I want texture, I want it from the gel, and not because the paper/image I was using was too wet and wrinkled beyond hope.
Does this make any sense? :)
If not, ask again----I have used some of these things for so long, I forget that others haven't and I know I miss steps, so I appreciate questions!!!
Hope you're having a GOOD day and my migraine FINALLY left!!!! WHOOPEE!!!!!!! :)
Anne
P.S. thanks for the comment on the project---I like it too!
See, Anne. I told ya we wanted to know about the process as well as see the end result.
Great tute, thanks for sharing it with us.
BTW: I found some church fabrics, fairly simplistic design in 4 colours for 17.00 a yard, will shoot pics to you shortly..
Ooooooooo.......coming after you.......for that fabric!!!! LOL!!!
Thank you Anne for your kind words. I am excited to see the finished product! I love your background music!
Thanks Ces---for the compliments and for all the fantastic art you've put out there.
There will be a gap in Blogland.....
I've seen large lots of the Staz on pads on ebay, they seemed like a good price but I didn't know the difference between them and other ink pads. Not only is your tutorial teaching us about collage it is teaching us what some of those other products are. Thanks, Anne.
Thank you so much for your explanation.
Question: I love to buy old wrapping paper and due a decopage on wood surfaces. What would you personally reccomend using as the binding ingredient and also, how would you reccomend tea staining the finish product?
I love a real olde world appearance to some of my chic papers so i'm wanting to do this right when it's time.
I can tell, I'm going to learn a lot hanging around this crew!! :)
Jan,
I'm going to have to check eBay---you always point me in the right direction for bargains, like those fluid acrylics!!! I still have you to thank every time I sit and pick a color!
Tammy,
I would seal the wood with a flat acrylic varnish; you can use Ceramcoat that you get at JoAnns. I finish most of my projects with one of their products. Dries good!
Try some of the Tim Holtz Distress Ink pads like I have in the photos, dab a bit on a rag first and try it on a scrap. You can control how much color you put on. Then spray with a fixative and finish with whatever topcoat you use.
I've not done your particular application before, but I don't know why it would differ too much from regular collage.
If this doesn't work---let me know what happens and we can brainstorm. You're always welcome to e-mail from my profile page too!
Have a good one---we're off to try a different church this morning.....hope it is a nice fit! :)
Post a Comment
Talk to me Dahling!
I'm waiting, breathless...... ;-D